Introduction:
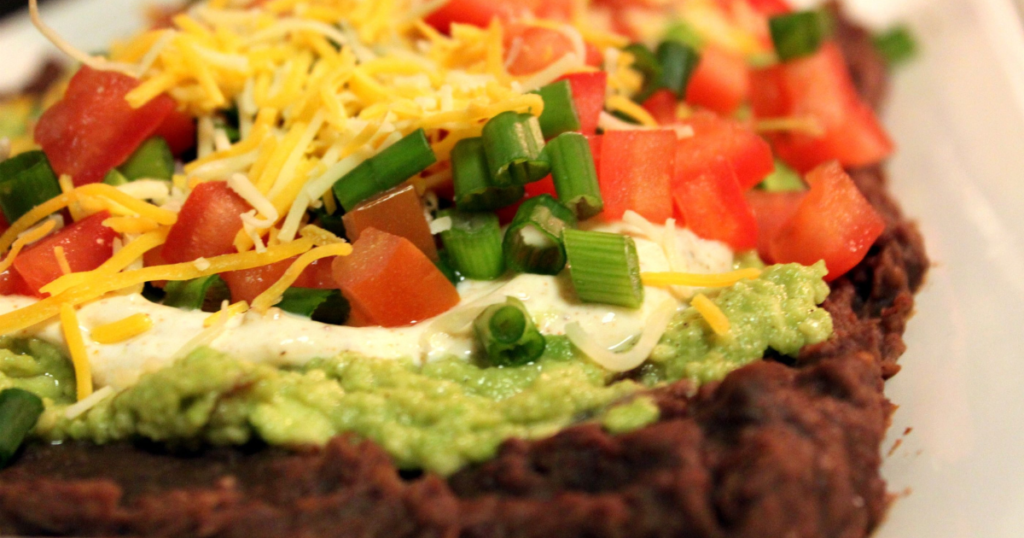
Taco dip recipe is a crowd-pleasing appetizer that brings the flavors of a classic taco into a shareable, creamy dip. It’s perfect for parties, game days, or casual family gatherings, with layers of seasoned cream cheese, salsa, fresh vegetables, and shredded cheese. Easy to make and even easier to customize, this recipe combines creamy, zesty, and crunchy elements that make each bite a flavor explosion.
In this article, we’ll explore a step-by-step guide to making a delicious 7-layer taco dip, as well as variations to suit different tastes. By the end, you’ll know how to make an appetizer that’s sure to impress, plus tips for serving and storing leftovers.

Table of Contents
Ingredients for Taco Dip
Here are the ingredients you’ll need for a classic 7-layer taco dip that serves about 8–10 people:
- 8 oz cream cheese, softened – Forms the creamy base.
- 1 cup sour cream – Adds a tangy taste and smooth texture.
- 1 packet taco seasoning – For authentic taco flavor.
- 1 cup salsa – Use a chunky salsa for added texture.
- 1 cup shredded lettuce – Adds a fresh, crunchy layer.
- 1 cup shredded cheese – Cheddar or Mexican blend works well.
- 1/2 cup black olives, sliced – Optional, for a salty contrast.
- 1/2 cup diced tomatoes – Adds freshness and a pop of color.
- 1/2 cup green onions, chopped – For a mild onion flavor.
Step 1: Prepare the Creamy Base
The base layer of the taco dip is a creamy blend of cream cheese, sour cream, and taco seasoning. This combination gives a smooth texture with a subtle tang and a hint of spice.
- In a mixing bowl, combine the softened cream cheese, sour cream, and taco seasoning.
- Use a hand mixer or a whisk to blend until smooth. Ensure the mixture is well-combined so that every bite has a uniform flavor.
Step 2: Spread the Base Layer
Once your creamy base is ready, it’s time to spread it evenly in the dish. A 9×13-inch baking dish works well for this recipe, but any similar-sized dish will do.
- Use a spatula to evenly spread the cream cheese mixture along the bottom of the dish.
- Smooth out the surface so the dip has an even foundation for the layers to follow.
Step 3: Add the Salsa Layer
The salsa layer is where you’ll add tangy, zesty flavor that complements the creamy base. Choose a salsa that matches your spice preference—mild, medium, or hot.
- Gently spoon the salsa over the cream cheese mixture.
- Spread it evenly, covering the base layer without mixing it in.
Tip: If you prefer a thicker dip, you can add a layer of refried beans before the salsa layer. This adds a hearty element to the dip and pairs well with the other layers.
Step 4: Shredded Lettuce for Freshness
The shredded lettuce layer adds a refreshing crunch, making the dip feel light and balanced.
- Pat the shredded lettuce dry with a paper towel to remove excess moisture, which helps keep the dip from becoming soggy.
- Evenly sprinkle the lettuce over the salsa layer.
Step 5: Top with Shredded Cheese
Now it’s time to add the cheese layer. A blend of Cheddar and Monterey Jack works wonderfully, but feel free to use a Mexican cheese blend or your favorite shredded cheese.
- Evenly sprinkle the shredded cheese over the lettuce.
- Aim for an even layer so every scoop of dip has a bit of cheesy goodness.
Step 6: Finish with Fresh Toppings
For the final layers, add toppings like diced tomatoes, black olives, and green onions for added color, flavor, and texture.
- Tomatoes: Dice fresh tomatoes and sprinkle them over the cheese layer.
- Black Olives: Slice olives and distribute them evenly. These add a slightly salty, briny flavor.
- Green Onions: Chop green onions and sprinkle them on top. Their mild flavor balances out the creaminess.
Step 7: Chill and Serve
Chilling the dip allows the flavors to meld together, making it taste even better. Place it in the fridge for at least 1 hour before serving.
- Cover the dish with plastic wrap or foil and refrigerate.
- Serve with tortilla chips, pita chips, or fresh vegetables like bell peppers, carrots, and celery for dipping.

Taco Dip Variations
One of the great things about taco dip is how versatile it is. Here are a few variations to suit different dietary preferences or to change up the flavor:
- Vegetarian Taco Dip: Omit the taco seasoning (which often contains animal-based ingredients) or use a vegetarian taco seasoning mix. Add more fresh vegetables, such as diced bell peppers or jalapeños, for extra crunch.
- Layered Bean Dip: Add a layer of refried beans as the first layer or use black beans for a protein-packed variation. The beans add heartiness and pair well with the creamy base.
- Spicy Taco Dip: For a spicy version, use hot salsa and add diced jalapeños or serrano peppers to the topping layer.
- Meat-Lover’s Taco Dip: Cooked ground beef or seasoned ground turkey can be added as an additional layer between the cream cheese base and the salsa. Season the meat with taco seasoning for a fully loaded dip.
- Guacamole Layer: Add a layer of guacamole for a creamy, avocado twist. Simply spread a thick layer of guacamole over the salsa before adding the other toppings.
- Healthier Taco Dip: Use Greek yogurt in place of sour cream and a low-fat cheese blend for a lighter version. You can also add more fresh vegetables in place of the cheese.

Tips for Making the Best Taco Dip
Here are some helpful tips to ensure your taco dip turns out perfect every time:
- Choose Fresh Ingredients: Using fresh tomatoes, lettuce, and onions gives the dip a vibrant, crisp flavor.
- Avoid Watery Dip: To prevent the dip from becoming watery, drain any excess liquid from the salsa, pat the lettuce dry, and seed the tomatoes before adding them.
- Customize the Layers: Feel free to add or remove layers based on your preference. Taco dip is highly adaptable, and each layer adds its own unique flavor.
- Make Ahead of Time: You can prepare the dip a few hours in advance. Just cover and refrigerate until you’re ready to serve.
- Adjust the Spice: If you prefer a milder dip, use mild salsa and a mild taco seasoning. For extra heat, use hot salsa and add fresh jalapeños.

Serving and Presentation Ideas
Presenting your taco dip can make it even more inviting. Here are some ways to make it stand out at your next gathering:
- Individual Cups: Serve the taco dip in small, individual cups for easy grabbing and less mess.
- Layered Jars: Use mason jars to create a layered effect for each serving.
- Toppings Bar: Set up a toppings bar with extra ingredients like sliced jalapeños, diced avocado, cilantro, or hot sauce so guests can customize their dip.
- Garnish with Fresh Herbs: Sprinkle a bit of fresh cilantro or parsley on top for added color and freshness.
Storing Leftovers
If you have leftover taco dip, you can store it in the refrigerator for up to 3 days. Keep it covered with plastic wrap or transfer it to an airtight container. The dip may start to separate slightly, so stir it before serving leftovers. Unfortunately, taco dip doesn’t freeze well, so it’s best enjoyed fresh or within a few days.
Frequently Asked Questions
1. Can I make taco dip without cream cheese?
- Yes, you can substitute the cream cheese with Greek yogurt or ricotta cheese for a lighter version.
2. What chips go best with taco dip?
- Tortilla chips are classic, but you can also serve taco dip with pita chips, plantain chips, or fresh veggies.
3. Can I use homemade taco seasoning?
- Absolutely! A homemade blend of chili powder, cumin, paprika, garlic powder, and onion powder works well.
4. How long can I leave taco dip out at room temperature?
- Because it contains dairy, it’s best to limit it to 2 hours at room temperature. If the party lasts longer, set the dish on ice or refrigerate occasionally to keep it fresh.
Conclusion:
Taco dip is a fun, flavorful dish that’s always a hit at gatherings. By layering fresh ingredients with creamy, cheesy goodness and a hint of spice, you’ll create a dip that’s bursting with flavor and texture. Whether you keep it classic or customize it with your favorite ingredients, this taco dip recipe is guaranteed to become a go-to for parties, game days, or family nights.

